Mobile Device Setup Instructions
- IMAP/POP Account Setup Overview
- Quick Start Setup
- Platform/Device Specific Steps
IMAP/POP Account Setup Overview
Bluetie supports the ability to sync your mailbox items to your mobile device using either IMAP or POP. We recommend you choose IMAP due to its ability to handle synchronization of any Inbox subfolders you may have created, and the ability to synchronize any status changes made to your mailbox across all clients and devices you may use to access your account (e.g., message marked as “Read” or deleted).
Quick Start Setup Steps
These are the general steps and settings required for configuring either an IMAP or POP account on your mobile device or email client:
- Add or create a new email account on your device or client (IMAP is recommended)
- Enter your username. This can be either your email address, or your User ID (username.enterprisename)
- Enter your password
- Enter the appropriate incoming server hostname, based on the type of account you are setting up:
- If setting up an IMAP account (recommended), enter the following incoming server name: imap.bluetie.com
- If setting up a POP account, enter the following incoming server name: pop.bluetie.com
- Enter the following outgoing server hostname: smtp.bluetie.com
- o Ensure that “Password Authentication” or “Require Sign-in” is enabled, and that you have entered your valid email address and password under the outgoing server settings (this is required in order to be able to send)
- Save your account settings
Platform/Device-Specific Setup Instructions
iOS Devices
iPhone, iPad
Setup an IMAP or POP Account Manually
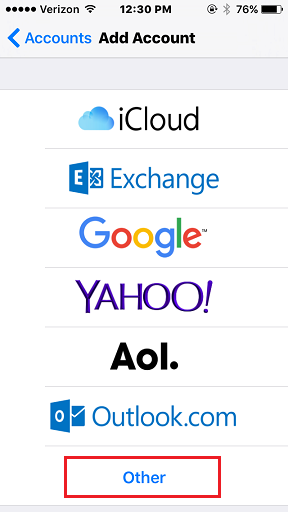
- From your homescreen, go to Settings > Mail > Accounts > Add Account
- On the Add Account screen, select Other
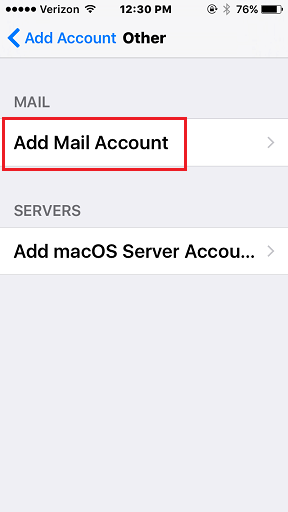
- Select Add Account > Other > Add Mail Account
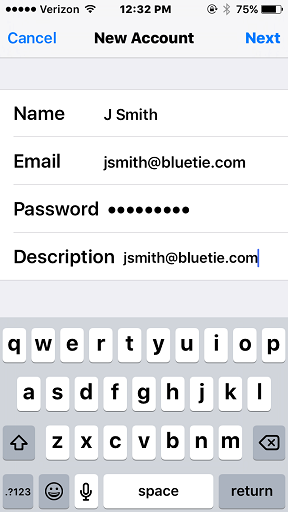
- - Enter your name, email address & password, and a description for your account, then select Next
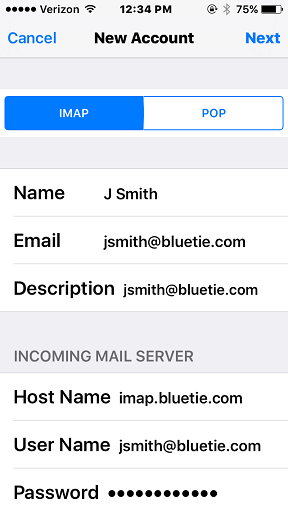
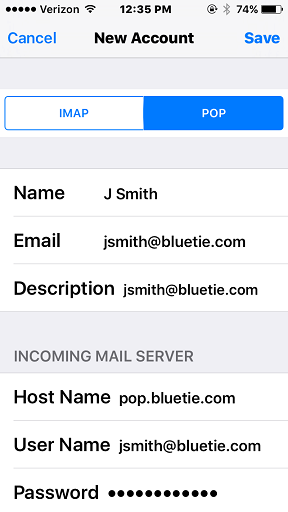
- Choose whether to use IMAP or POP for your new account (we recommend IMAP):
- On the New Account screen, follow these steps:
- If setting up an IMAP account, set the Incoming Mail Server host name to: imap.bluetie.com
- Username: Enter your email address, or your User ID (username.enterprisename)
- Password: Enter your password
- If setting up a POP account, set the Incoming Mail Server host name to: pop.bluetie.com
- Username: Enter your email address, or your User ID (username.enterprisename)
- Password: Enter your password
- Outgoing Server Host name: smtp.bluetie.com
- Username: Enter your email address, or your User ID (username.enterprisename)
- Password: Enter your password
- Select Save
- Your account should begin to sync, and you should now be able to access it using the default email application
Android Devices
Samsung Galaxy S7 - IMAP Account Setup
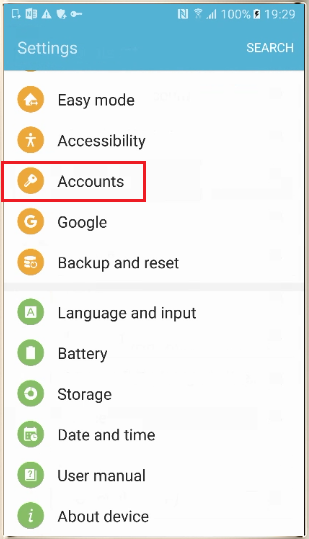
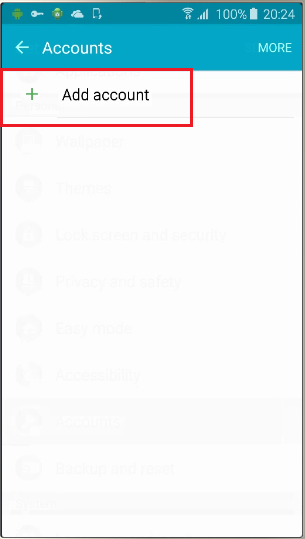
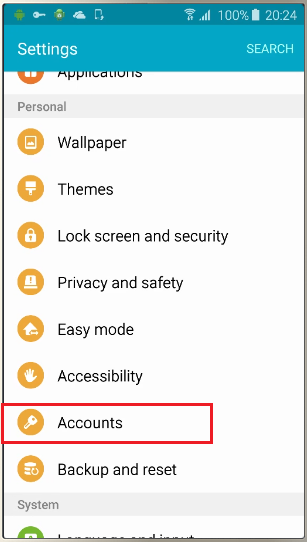
- From your homescreen, select Settings > Accounts
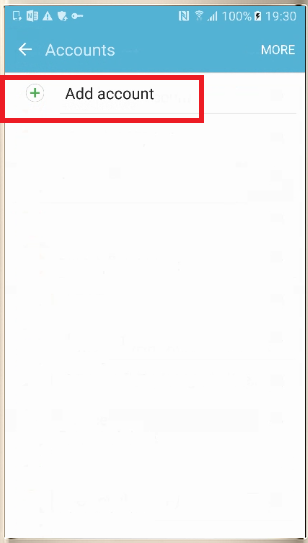
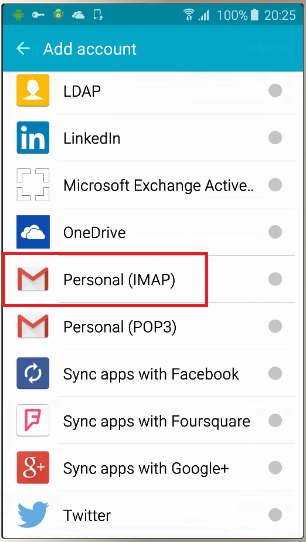
- Select "Add account"
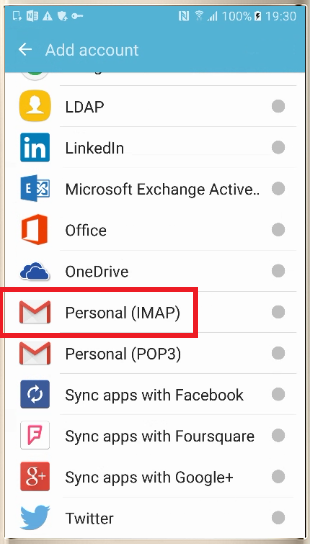
- Select "Personal"
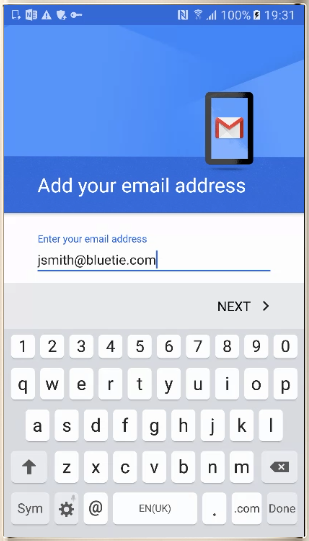
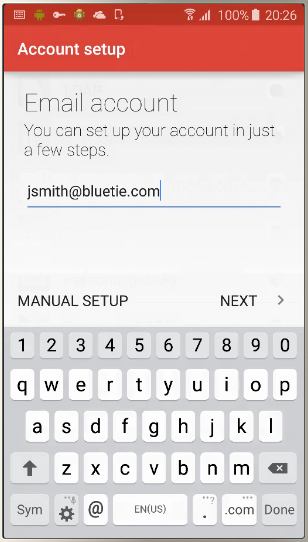
- Enter your email address and select "Next"
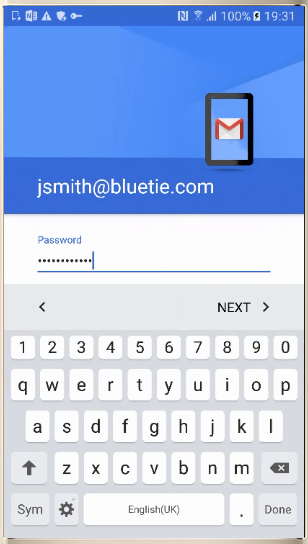
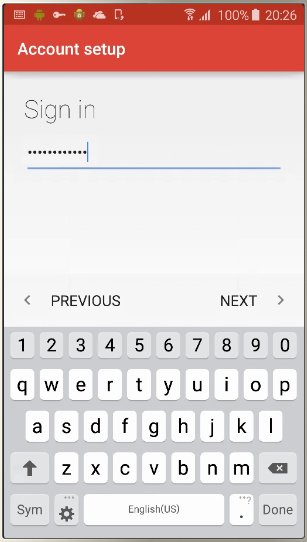
- Enter your password and select "Next"

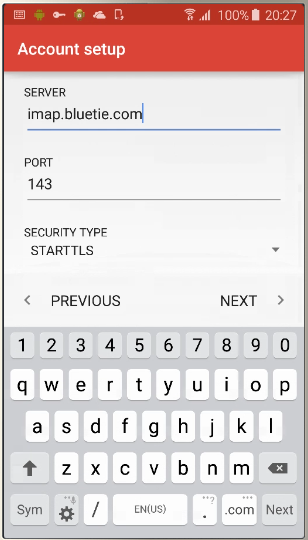
- On the "Incoming server settings screen, enter the following, then select "Next"
- Username: Enter your email address, or your User ID
(username.enterprisename) - Authentication / Password: Your password
- Server: imap.bluetie.com
- Port: 143
- Security Type: STARTTLS

- Username: Enter your email address, or your User ID
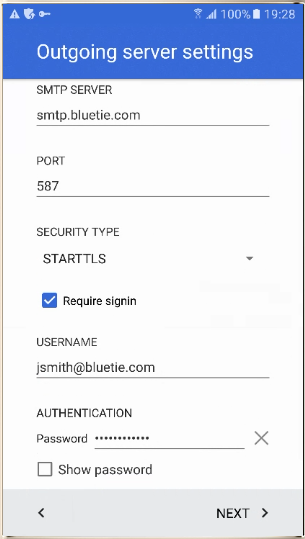
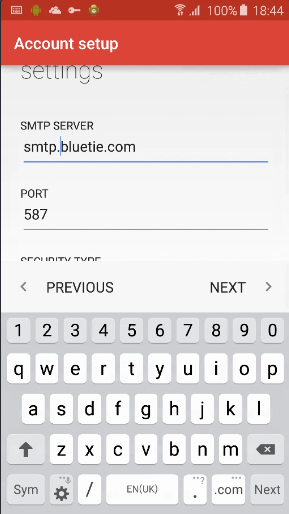
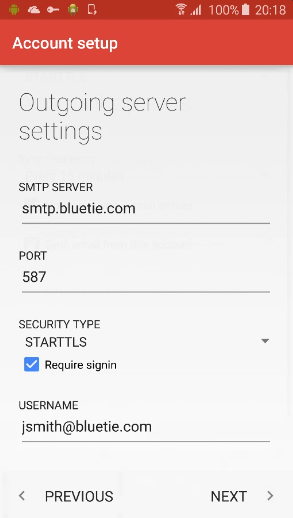
- On the "Outgoing server settings" screen, enter the following, then select "Next":
- SMTP Server: smtp.bluetie.com
- Port: 587
- Security Type: STARTTLS
- "Require Sign-in" must be checked/enabled
- Username: Your email address, or your UserID
(username.enterprisename) - Authentication / Password: Your password
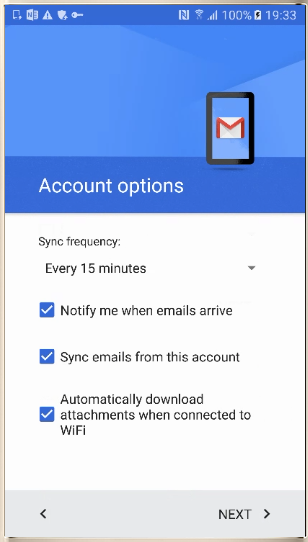
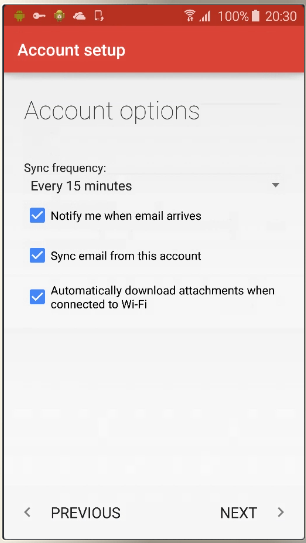
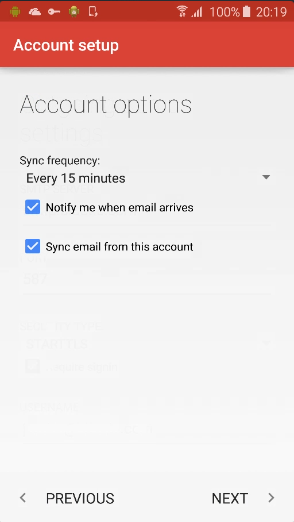
- Choose your desired Account sync options, then select "Next"
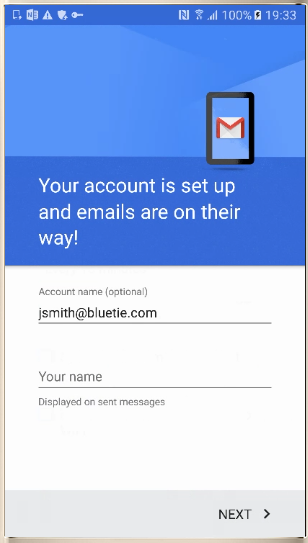
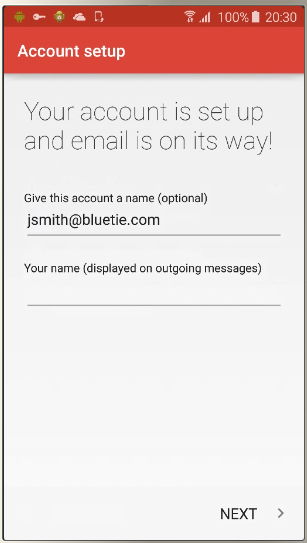
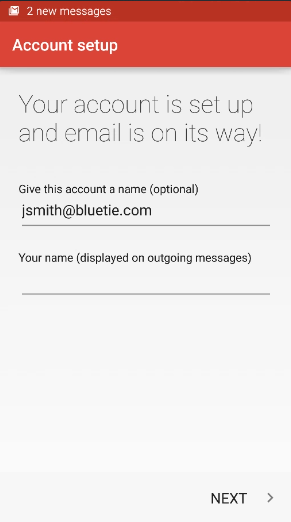
- Set your "Account Name" and "Your Name" as desired, then select "Next"

- Select "Next" and save your account setup. You can now access your account via your email app.
Samsung Galaxy S7 - POP Account Setup
- From your homescreen, select "Settings > Accounts"

- Select "Add account"

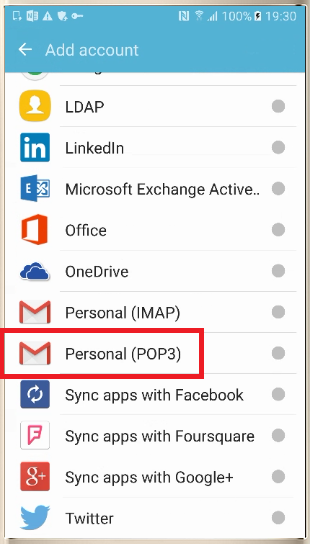
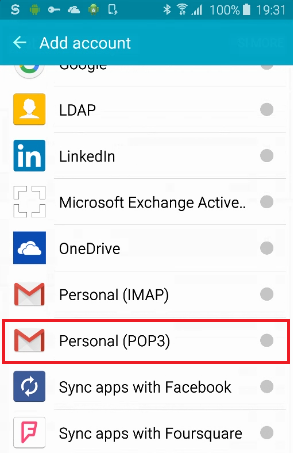
- Select "Personal (POP3)"
- Enter your email address and select "Next"
- Enter your password and select "Next"
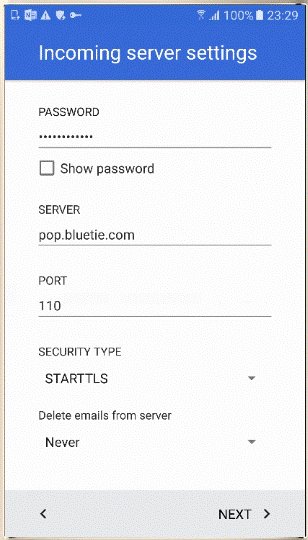
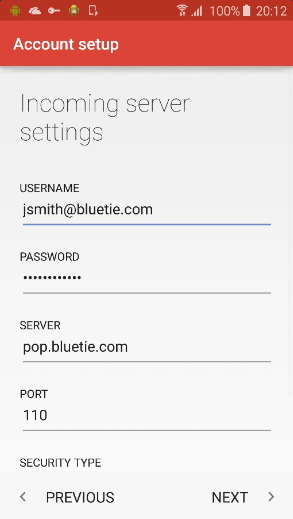
- On the "Incoming server settings screen, enter the following, then select "Next":
- Username: Enter your email address, or your User ID
(username.enterprisename) - Authentication / Password: Your password
- Server:"pop.bluetie.com"
- Port: 110
- Security Type: STARTTLS
- Delete emails from server: We highly recommend you set this option to "Never"
- Username: Enter your email address, or your User ID
Samsung Galaxy S6 - IMAP Account Setup
- From your homescreen, select "Settings > Accounts"

- Select "Add Account"
- Select "Personal (IMAP)"
- Enter your email address and select "Manual Setup"
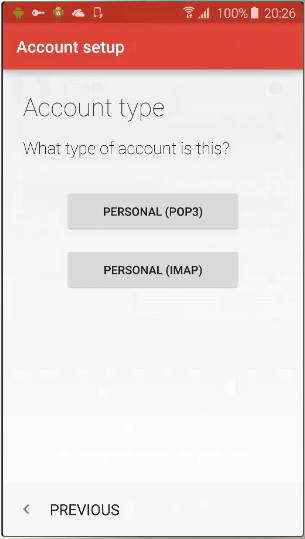
- Select "Personal (IMAP)" as your account type
- Enter your email address for Sign-in, then select "Next"
- On the "Incoming server settings" screen, enter the following, then select "Next"
- Username: Enter your email address, or your User ID
(username.enterprisename) - Authentication / Password: Your password
- Server: "imap.bluetie.com"
- Port: 143
- Security Type: STARTTLS
- Username: Enter your email address, or your User ID
- One the "Outgoing Server settings" screen, enter the following then select "Next":
- SMTP Server: smtp.bluetie.com
- Port: 587
- Security Type: STARTTLS
- "Require Sign-in" must be checked/enabled
- Username: Your email address, or your User ID
(username.enterprisename) - Autentication / Password: Your password
- Select your desired account options, then "Next"
- Modify the name of your account you have created on your device, or change how you;d like you "From" name to appear to recipients when sending from your device, then select "Next" to save / complete your setup.
Samsung Galaxy S6 - POP Account Setup
- From your homescreen, select "Settings > Accounts"
- Select "Add Account"

- Select "Personal (POP3)"
- Enter your email address, then select "Manual Setup"

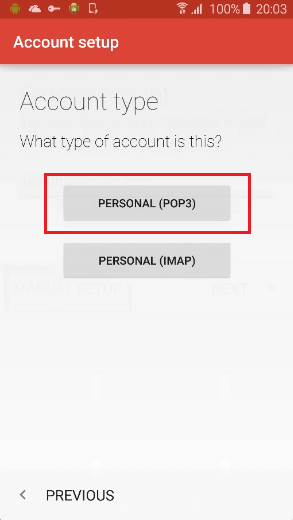
- For Account Type, select "Personal (POP3)"
- Under Sign In, enter your account password, then select "Next"

- Under Incoming Server Settings, enter the following, then select Next:
- Username: Enter your email address, or user ID
(username.enterprisename) - Password: Your account password
- Server: "pop.bluetie.com"
- Port: 110
- Security Type: STARTTLS
- Delete email from server: It is recommended to set this option to "Never"
- Username: Enter your email address, or user ID
- Under Outgoing Server Settings, enter the following, then select "Next":
- SMTP Server: "smtp.bluetie.com"
- Port: 587
- Security Type: STARTTLS
- The "Require Sign-in" option must be checked or enabled
- Username: Enter your email address, or user ID
(username.enterprisename) - Password: Your account password
- Under Account Options, select your desired settings (synchronization frequency, notifications, etc.), then "Next"
- Enter or change the account name on your device, and how you would like your name to appear on outgoing message, then select "Next" to complete your account setup
Windows Phone 8.1
Nokia Lumia 930 - IMAP Account Setup
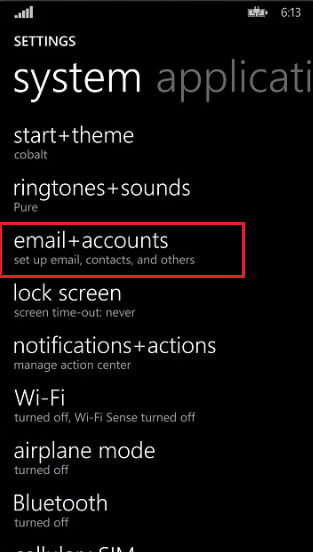
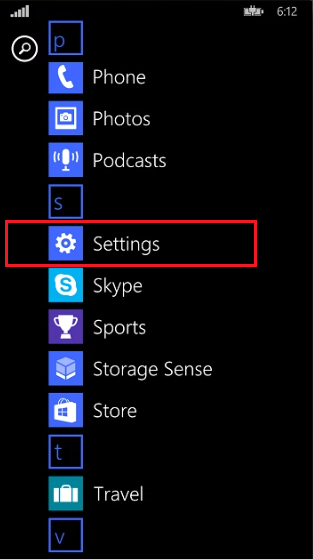
- From your homescreen, select "Settings"

- Select "email + accounts"
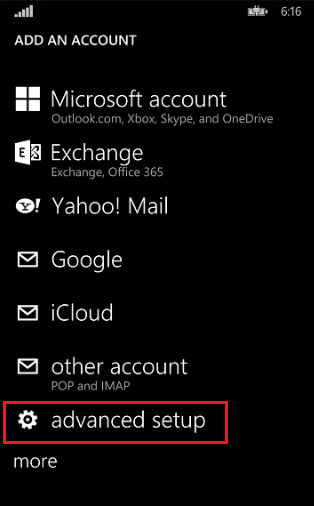
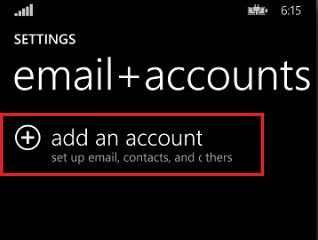
- Select "add an account"

- Select "advanced setup"
- Enter your email address or user ID (username.enterprisename), and enter your password

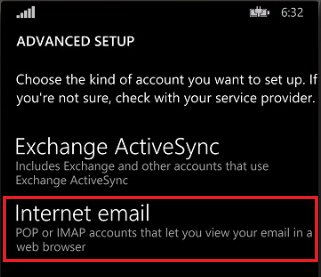
- Select "Next"
- Select "Internet email"
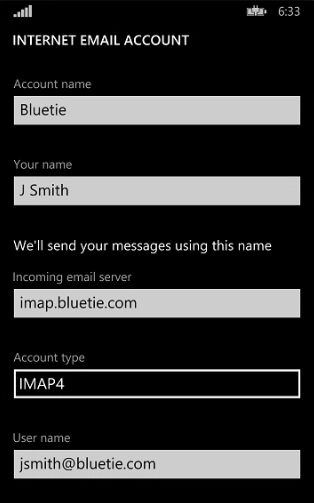
- On the "Internet Email Account" page, enter the following:
- Account name: (This is the name of the account you are setting up on your device)
- Your name: This is how your "From" name will appear when sending messages from your device
- Incoming email server: "imap.bluetie.com"
- Account type: IMAP4
- Username: Enter your email address, or your user ID (username.enterprisename)
- Password: Enter your password
- Outgoing (SMTP) email server: "smtp.bluetie.com"
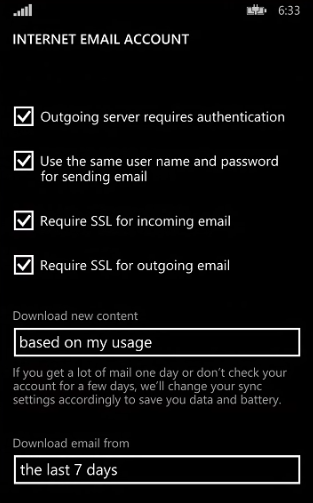
- The "Outgoing server requires authentication" option must be checked
- The "User the same user name and password for sending mail" option must be checked
- Select "Advanced settings", and check / enable the following:
- "Require SSL for incoming email"
- "Require SSL for outgoing email"
- Select "Sign-in"
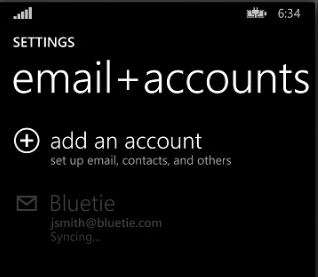
- Your newly created account should now be displayed as "Syncing" under your existing account list

- You can now access your message via the mail application
Nokia Lumia 930 - POP Account Setup
- From your homescreen, select "Settings"
- Select "email + accounts"

- Select "add an account"
- Select "advanced setup"

- Enter your email address or user ID (username.enterprisename), and your password

- Select "Next"
- Select "Internet email"

- On the "Internet Email Account" page, enter the following:
- Account name: (This is the name of the account you are setting up on your device)
- Your name: (This is how your "From:" name will appear when sending messages from your device)
- Incoming email server: "pop.bluetie.com"
- Account type: POP3
- Username: Enter your email address, or your user ID (username.enterprisename)
- Password: Enter your password

- Outgoing (SMTP) email server: smtp.bluetie.com
- The "Outgoing server requires authentication" option must be checked
- The "Use the same user name and password for sending mail" option must be checked
- Select "Advanced settings", and check / enable the following:
- "Require SSL for incoming email"
- "Require SSL for outgoing email"

- Select "Sign-in"
- Your newly created account should now be displayed as "Syncing" under your existing account list
- You can now access your messages via the mail application